Update time: January 13, 2025
If you’re using Contact Form 7 on your WordPress site and trying to track form submissions in GA4, you might have noticed it’s not as straightforward as you’d hope. Contact Form 7 doesn’t trigger a standard page view on submission — so you need another approach.
The good news? There are several ways to do it. In this article, I’ll walk you through the most reliable method using Contact Form 7’s built-in DOM events.
Understanding CF7’s DOM Events
Contact Form 7 fires several custom DOM events during Ajax form submissions. Each one tells you something different about what happened:
| Event | Description |
|---|---|
wpcf7invalid |
Form submitted, mail not sent — invalid input detected |
wpcf7spam |
Form submitted, mail not sent — possible spam detected |
wpcf7mailsent |
Form submitted and mail sent successfully |
wpcf7mailfailed |
Form submitted, but mail sending failed |
wpcf7submit |
Form submitted, regardless of outcome |
For this tutorial, we’ll track the wpcf7mailsent event — we only care about successful form submissions that actually delivered mail. The other events are useful if you want to track validation errors or spam detection, but that’s a separate use case.
Walkthrough: Tracking the Demo Request Form
Now we need to track successful form submissions on the Contact Form 7 page: https://www.bbccss.com/contact-form-7
In this section, we’ll learn how to implement Contact Form 7 form tracking using the DOM events provided by the plugin.
Step 1: Create the Custom HTML Listener
We need to inject a small JavaScript snippet that listens for the wpcf7mailsent event and pushes the data to the data layer.
In GTM , click「Tags」——「New」——「Choose a tags type to begin setup…」——「Custom HTML」,Name it “HTML – Contact Form 7 Listener”, and make the following settings: 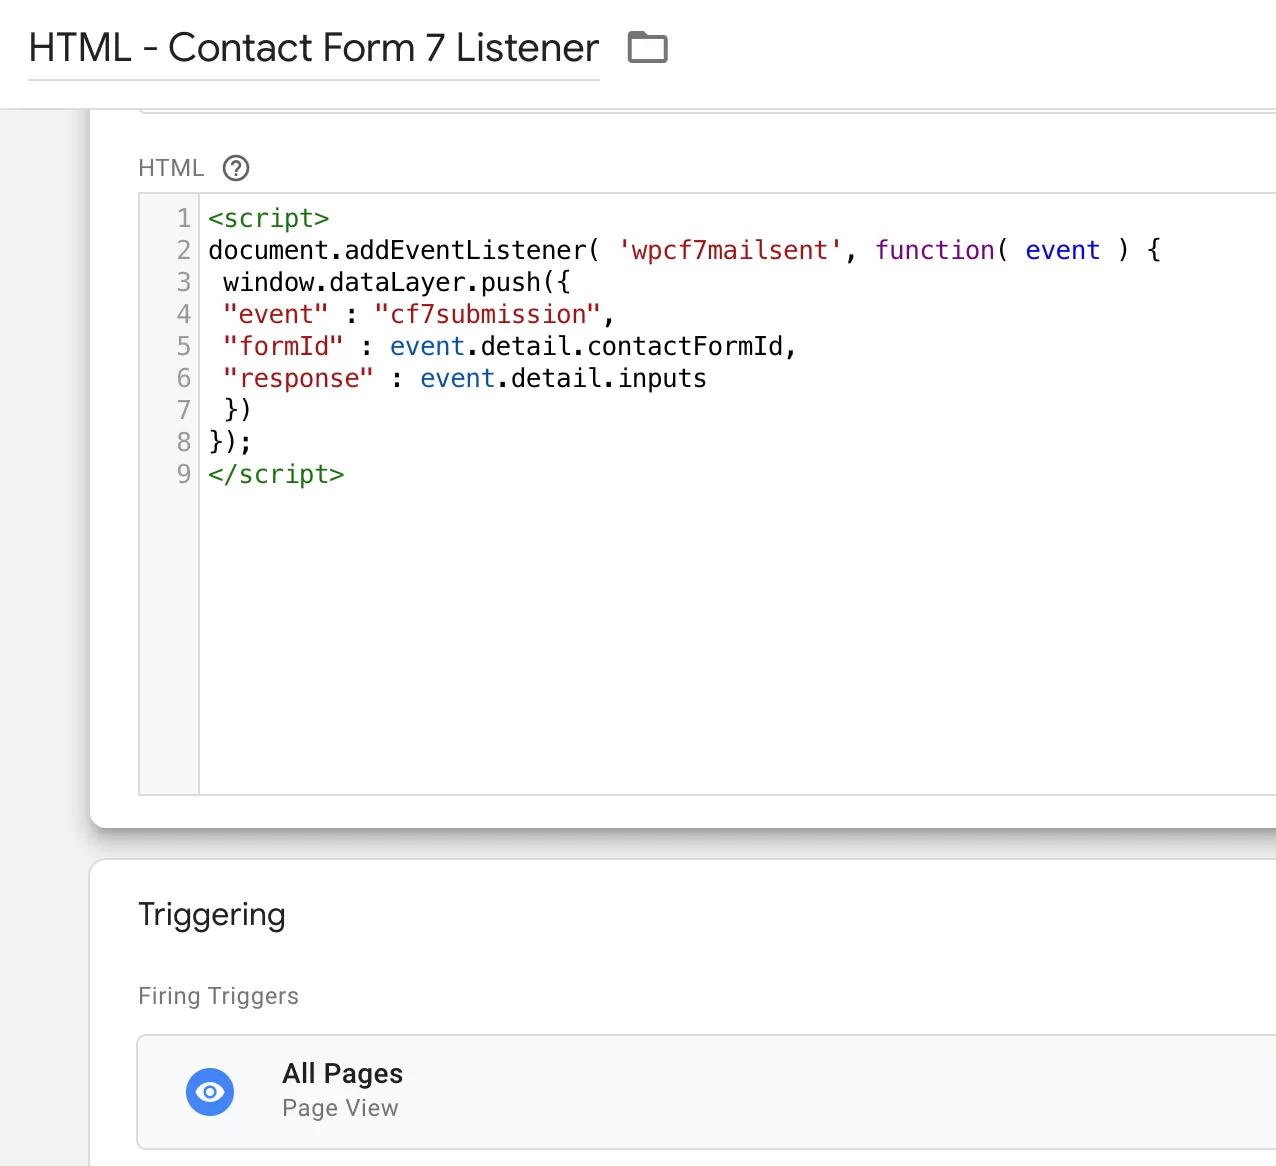
The purpose of this code is to send events through dataLayer.push when listening to wpcf7mailsent.
If you’re new to the addEventListener pattern, my article on GA4 Custom Events covers it in more detail.
Step 2 : Set Up the Variables
From the code above, you can see we’re pushing formId and response to the data layer. We need to capture them as GTM variables.
In GTM, click「 Variables」——「New」——「Choose a variable type to begin setup…」——「Data Layer Variable」, name it “dlv-formId”, and then set as follows:
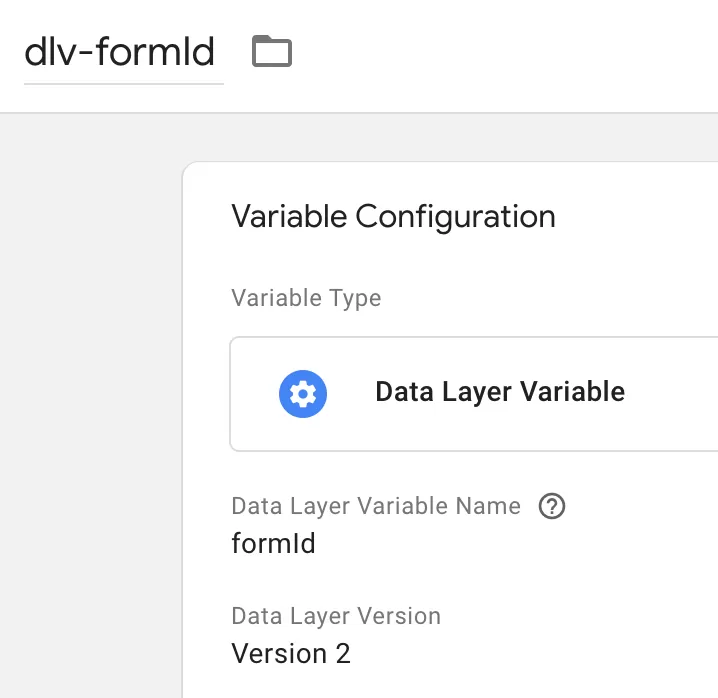
Set the dlv-response in the same way.
Step 3: Create the Custom Event Trigger
Now we need a trigger that activates when our listener pushes the custom event.
In GTM , click「Triggers」——「New」——「Choose a trigger type to begin setup…」——「Custom Event」,Name it “Custom Event- CF7 Submit Form”, and make the following settings:
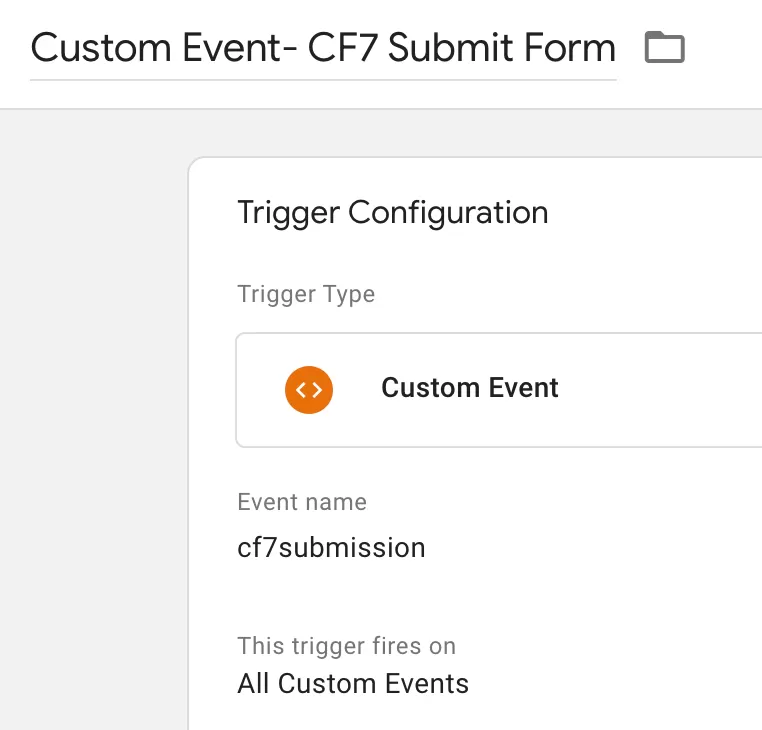
Set the Event Name to cf7submission — this must match the event name in the JavaScript code from Step 1.
Step 4 : Creating the GA4 Event Tag
Time to connect everything to GA4.
In GTM , click「Tags」——「New」——「Choose a tags type to begin setup…」——「Google Analytics: GA4 Event」,Name it “GA4-Event-CF7 Submit Form”, and make the following settings: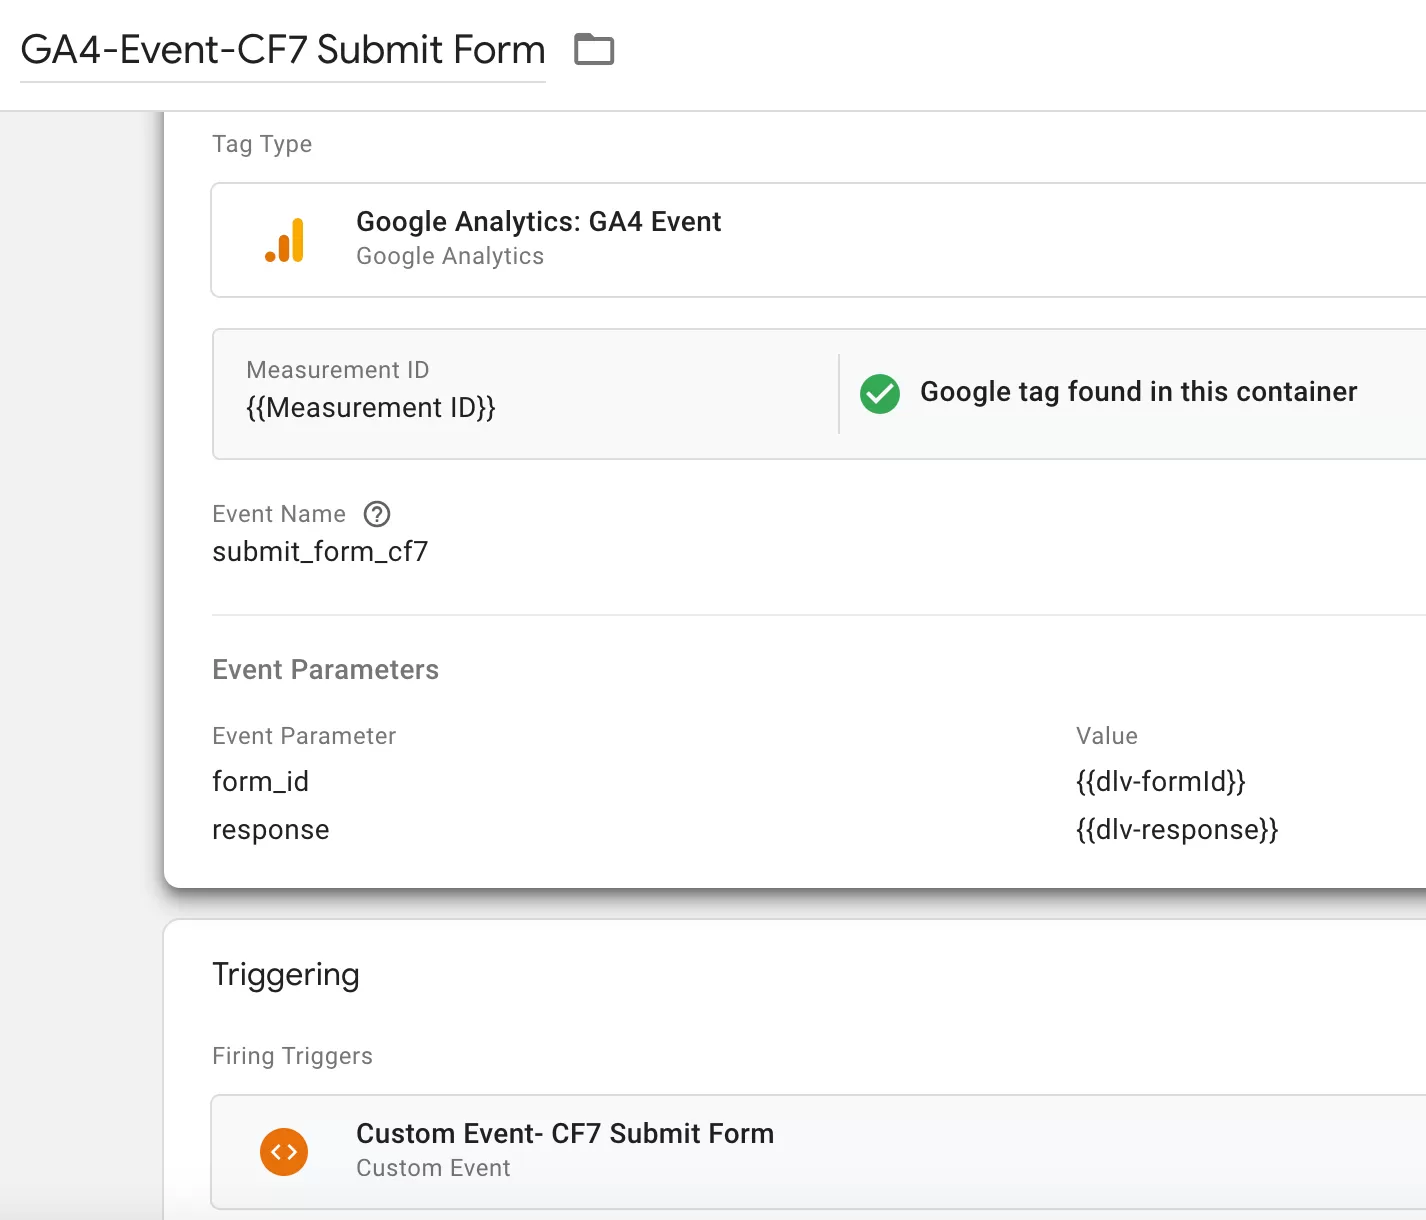
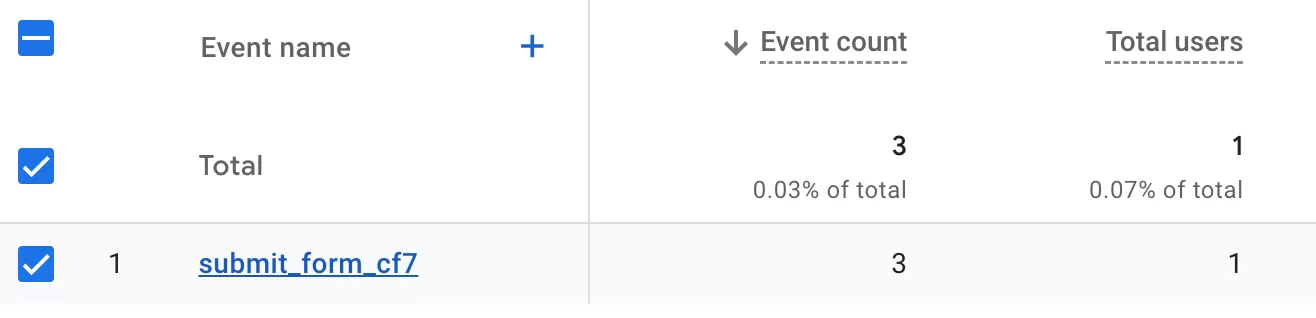
The Event name is submit_form_cf7.
Step 5 : Preview and Publish
Next is preview debugging.
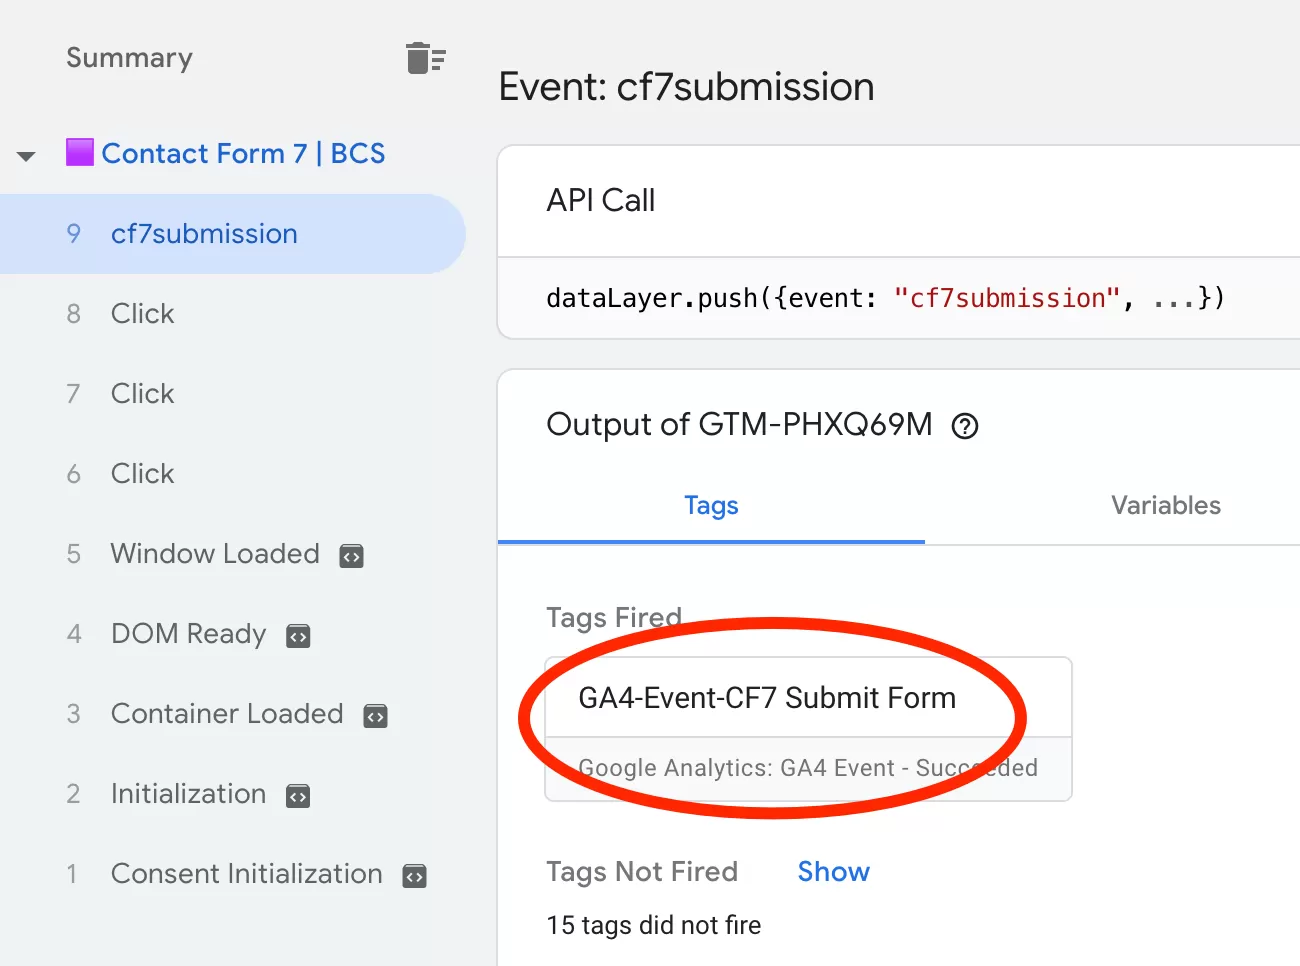
Tags is triggered and can be published.
Step 6 :Register Custom Dimension in GA4
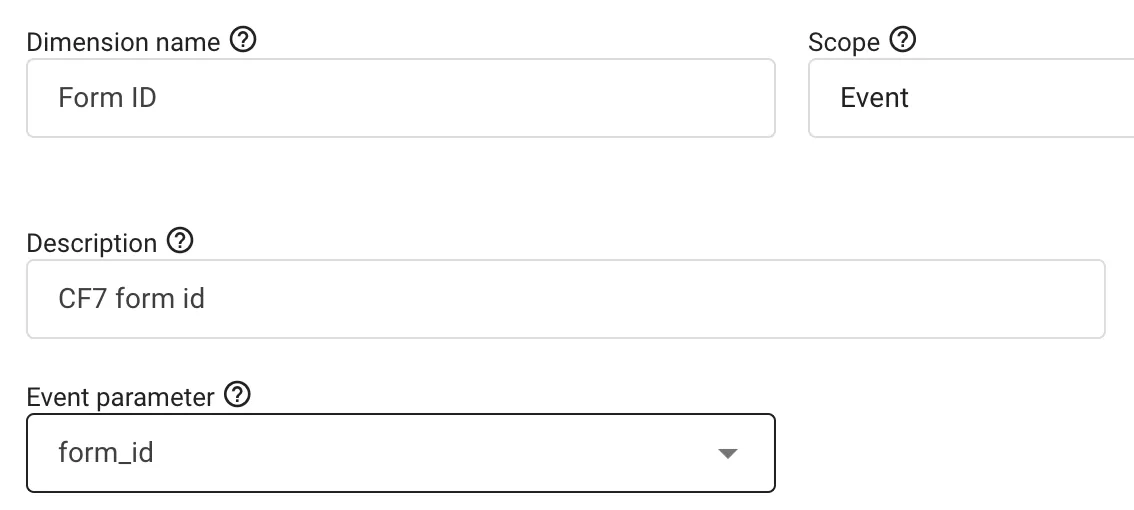
Now that the data is flowing into GA4, there’s one more step. If you want to use form_id, in your GA4 reports and explorations, you need to register it as a custom dimension.
In GA4,click「Admin」——「Custom definitions」——「Create custom dimension」, then do the following configuration:
Step 7 :Verify Data in GA4 Reports
After registration, it typically takes up to 24 hours before the data appears in your GA4 reports. Once it does, you can validate it in Event Reports:
Final Words
So there you have it — a complete step-by-step guide to tracking Contact Form 7 submissions in GA4. A simple addEventListener pushes the data, GTM picks it up with a Custom Event trigger, and GA4 records it as a structured event with a custom dimension.