Update time: January 12, 2025
If you’re using Gravity Forms on your WordPress site — for support tickets, contact forms, or lead generation — you probably want to know how many people actually submit them. The problem? Gravity Forms submissions load via AJAX, so there’s no page view to catch.
In this guide, I’ll walk you through the setup using Gravity Forms’ built-in gform_confirmation_loaded event. By the end, you’ll have a GA4 event firing every time someone successfully submits a Gravity Forms form.
How Gravity Forms Events Work
When Gravity Forms processes an AJAX form submission, it fires a custom jQuery event called gform_confirmation_loaded.
<script>
jQuery(document).ready( function() {
jQuery(document).bind('gform_confirmation_loaded', function(event, formId){
	window.dataLayer.push({
            'event' : 'gravityFormSubmission',
            'gfformID' : formId
	});
});
	})
</script>
This event is triggered after the form validates, submits, and displays the confirmation message to the user.
Here’s what’s happening under the hood:
- User fills out a Gravity Forms form and clicks Submit
- Gravity Forms sends the data via AJAX (no page reload)
- The plugin processes the submission server-side
- On success, jQuery fires gform_confirmation_loaded on the document
- The event passes the form’s ID as a second argument to any listener
So to track this in GTM, all we need to do is listen for that event, grab the form ID, and push it into the data layer. Then GTM picks it up and sends it to GA4.
Why jQuery?Gravity Forms bundles jQuery internally and uses it extensively for its AJAX functionality. Using jQuery’s .on() method is the most reliable way to hook into the event.
Use Case Example
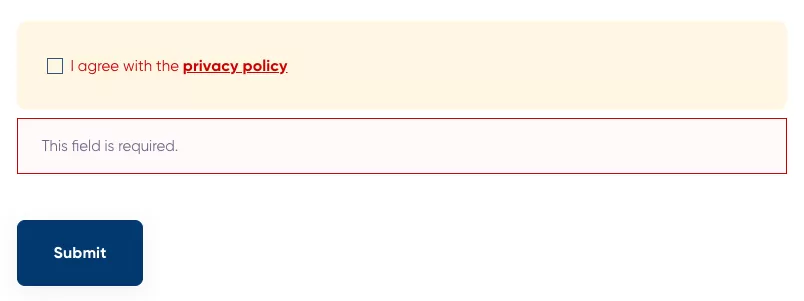
Let’s apply this to a real example. I’ll use the Gravity Forms support ticket form on https://www.gravityforms.com/open-support-ticket/general/ as our target.
Step 1: Create the jQuery Custom HTML Listener
In GTM , click「Tags」——「New」——「Choose a tags type to begin setup…」——「Custom HTML」,Name it “HTML – Gravity Forms Listener”, and make the following settings: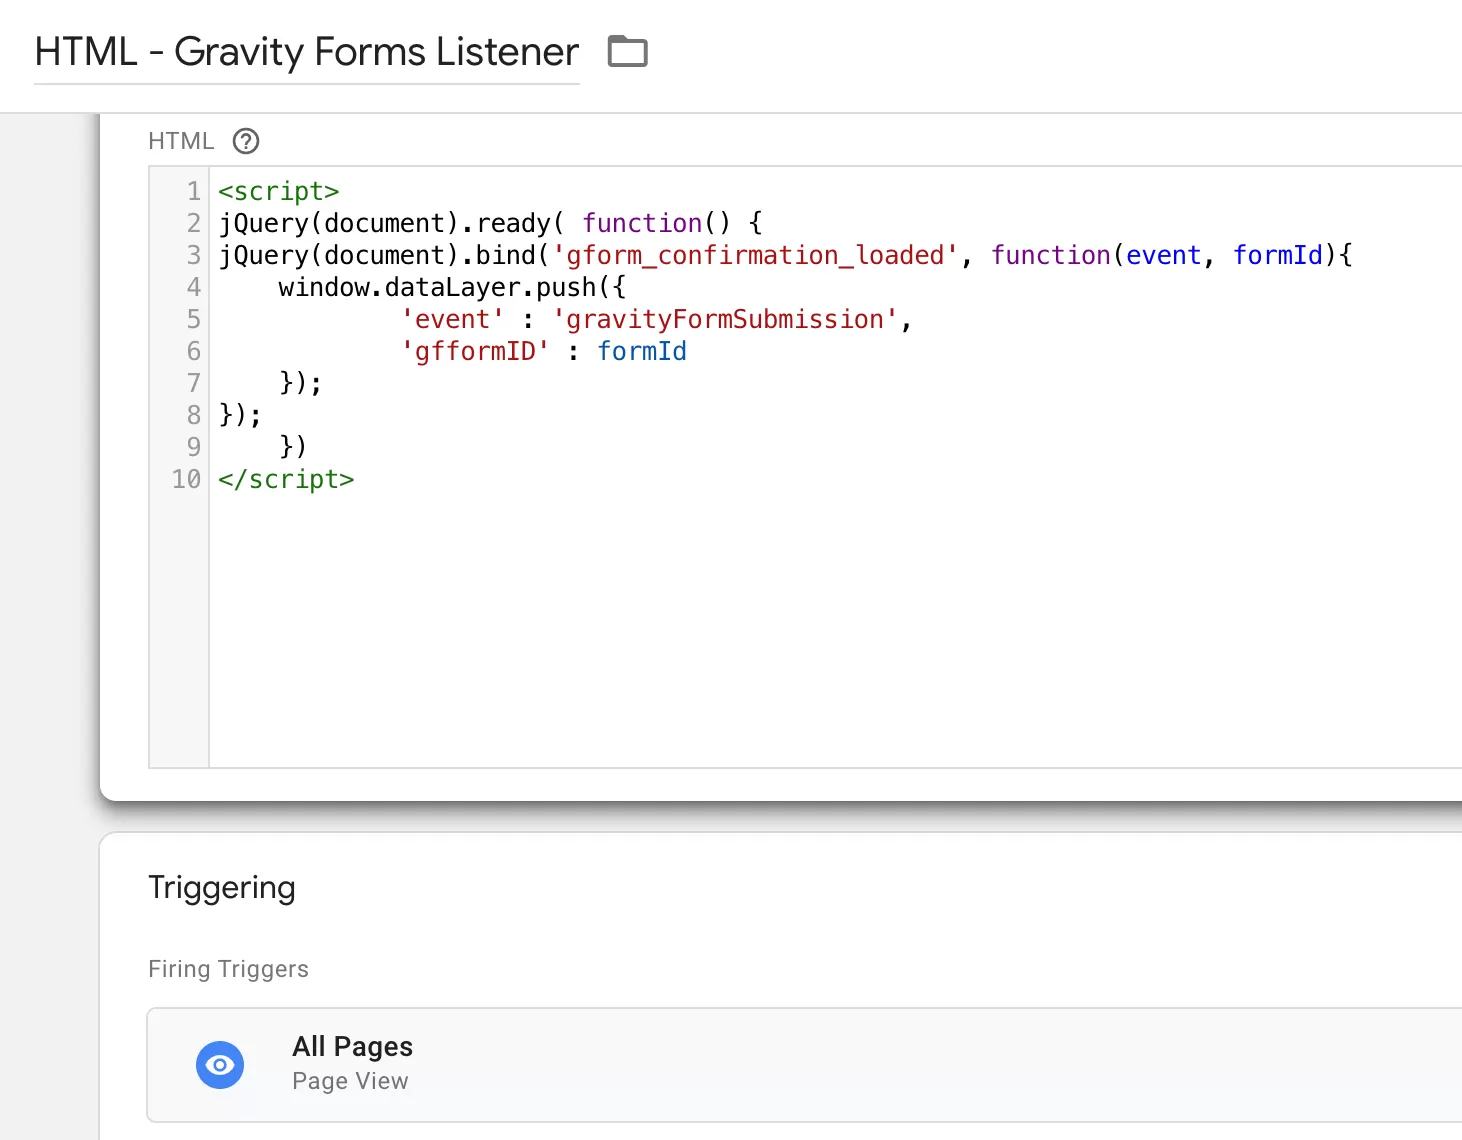
Step 2: Set Up the Data Layer Variable
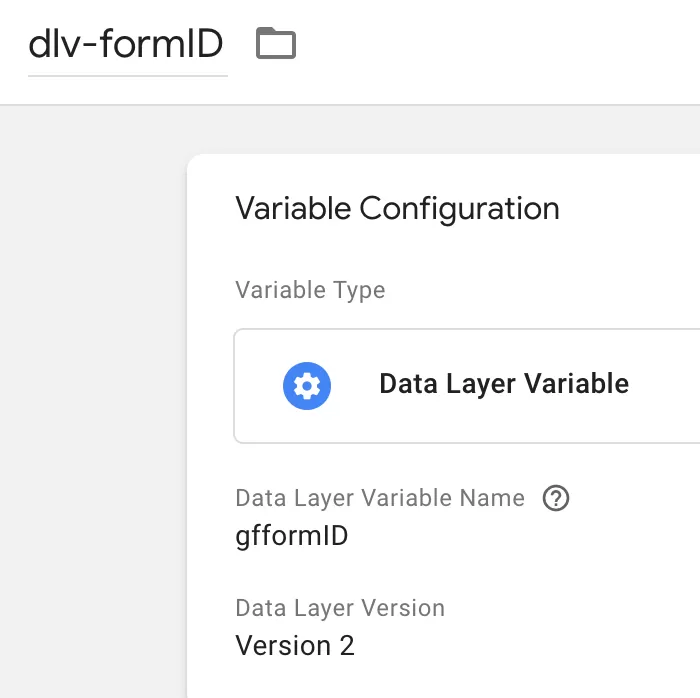
From the code, we can know that there are data layer variables gfformID in the data layer, which need to be obtained using data layer variables in GTM.
In GTM, click「 Variables」——「New」——「Choose a variable type to begin setup…」——「Data Layer Variable」, name it “dlv-formID”, and then set as follows:、
Step 3: Create the Custom Event Trigger
In GTM , click「Triggers」——「New」——「Choose a trigger type to begin setup…」——「Custom Event」,Name it “Custom Event- Gravity Forms Submit Form”, and make the following settings:
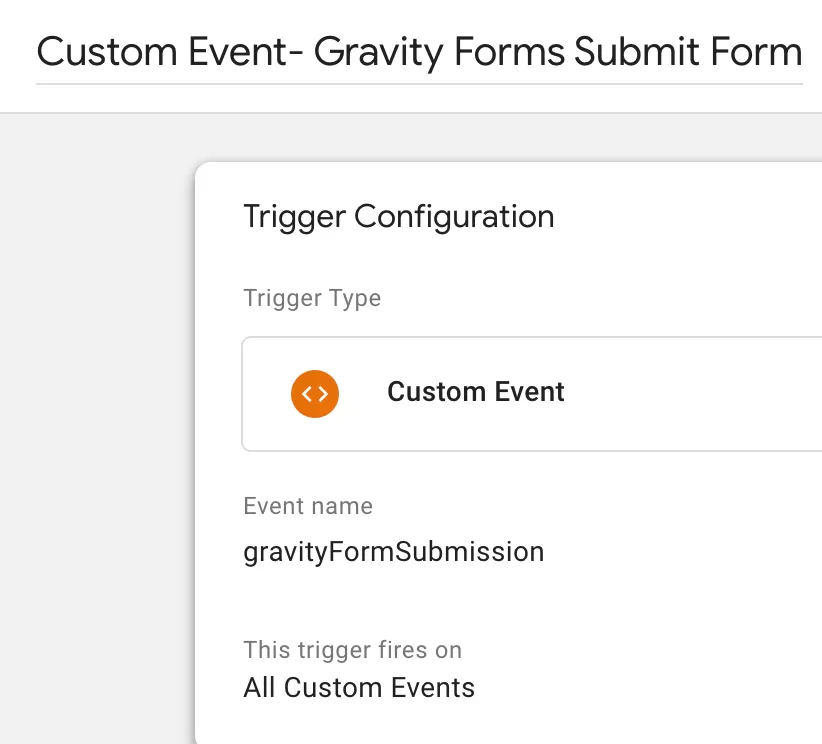
From the code, we can know that the event is gravityFormSubmission, so the event name is set to gravityFormSubmission
Step 4: Create the GA4 Event Tag
In GTM , click「Tags」——「New」——「Choose a tags type to begin setup…」——「Google Analytics: GA4 Event」,Name it “GA4-Event-Gravity Forms Submit Form”, and make the following settings: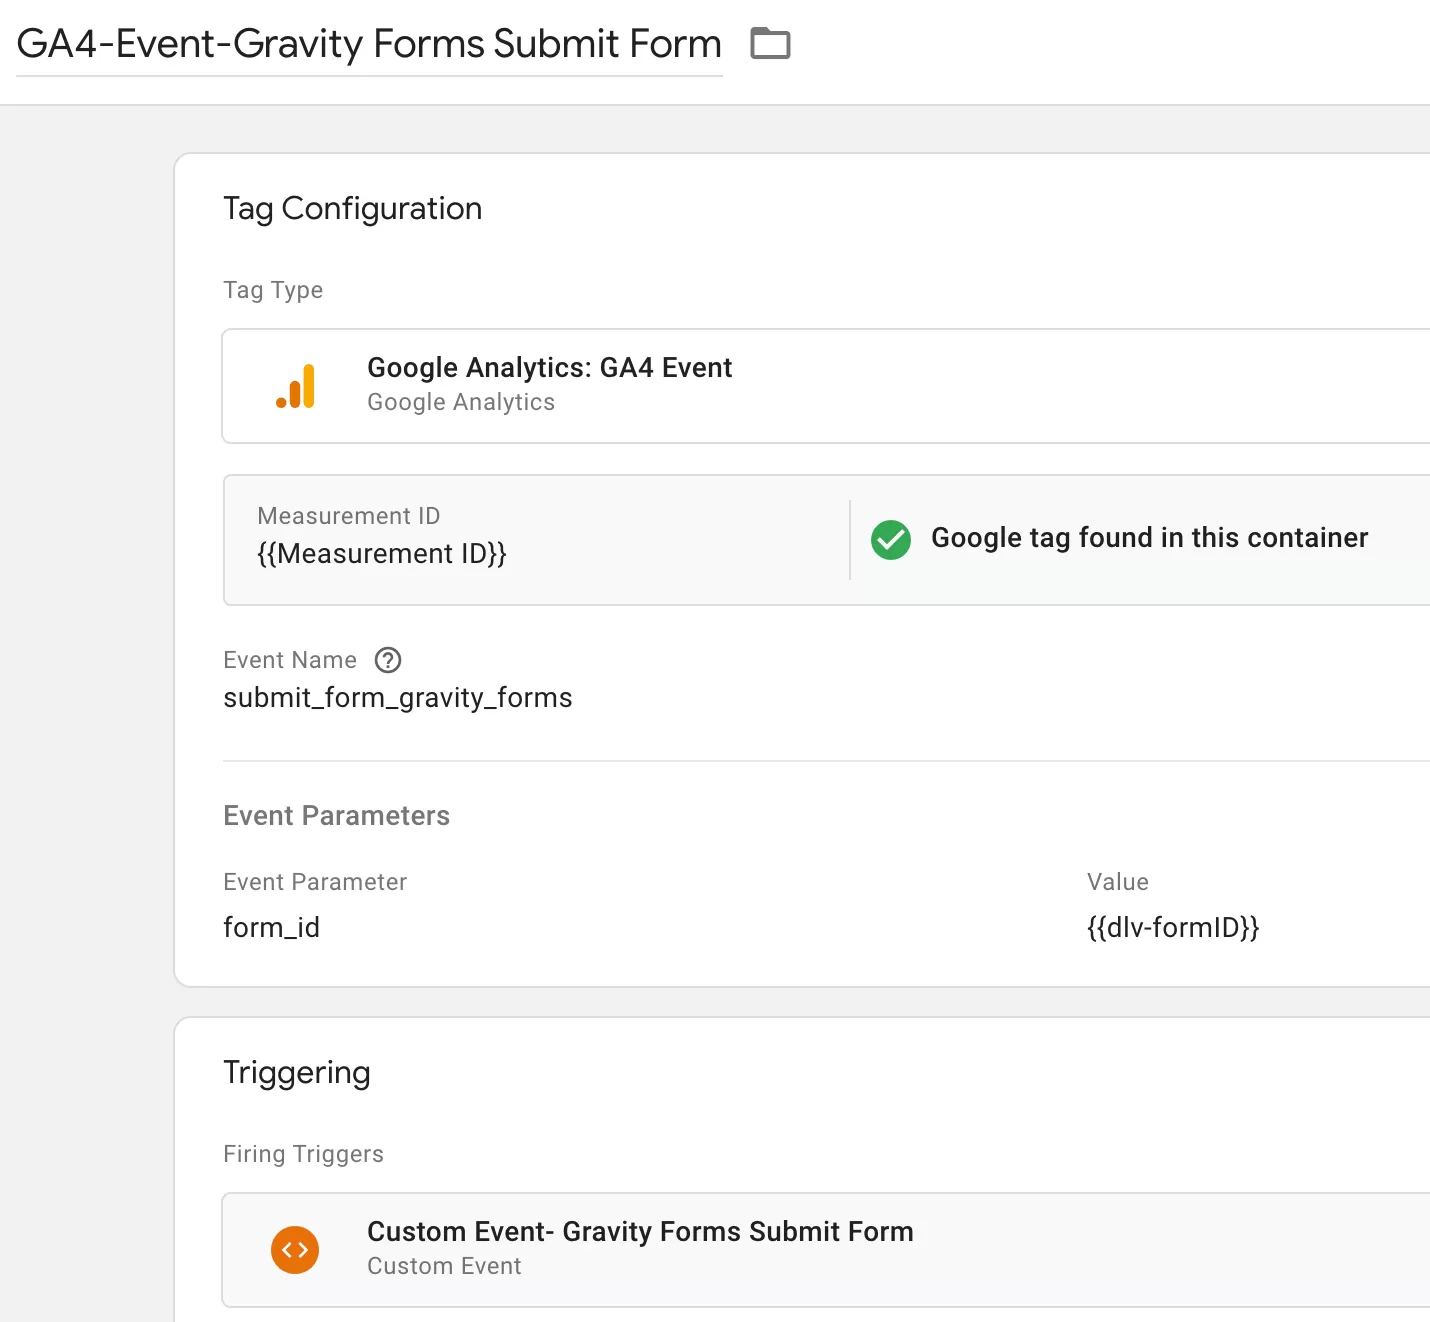
The event name is submit_form_gravity_forms
Step 5 : Preview and Publish
Click Preview in GTM, navigate to your form page, fill it out, and submit. In Tag Assistant, you should see:
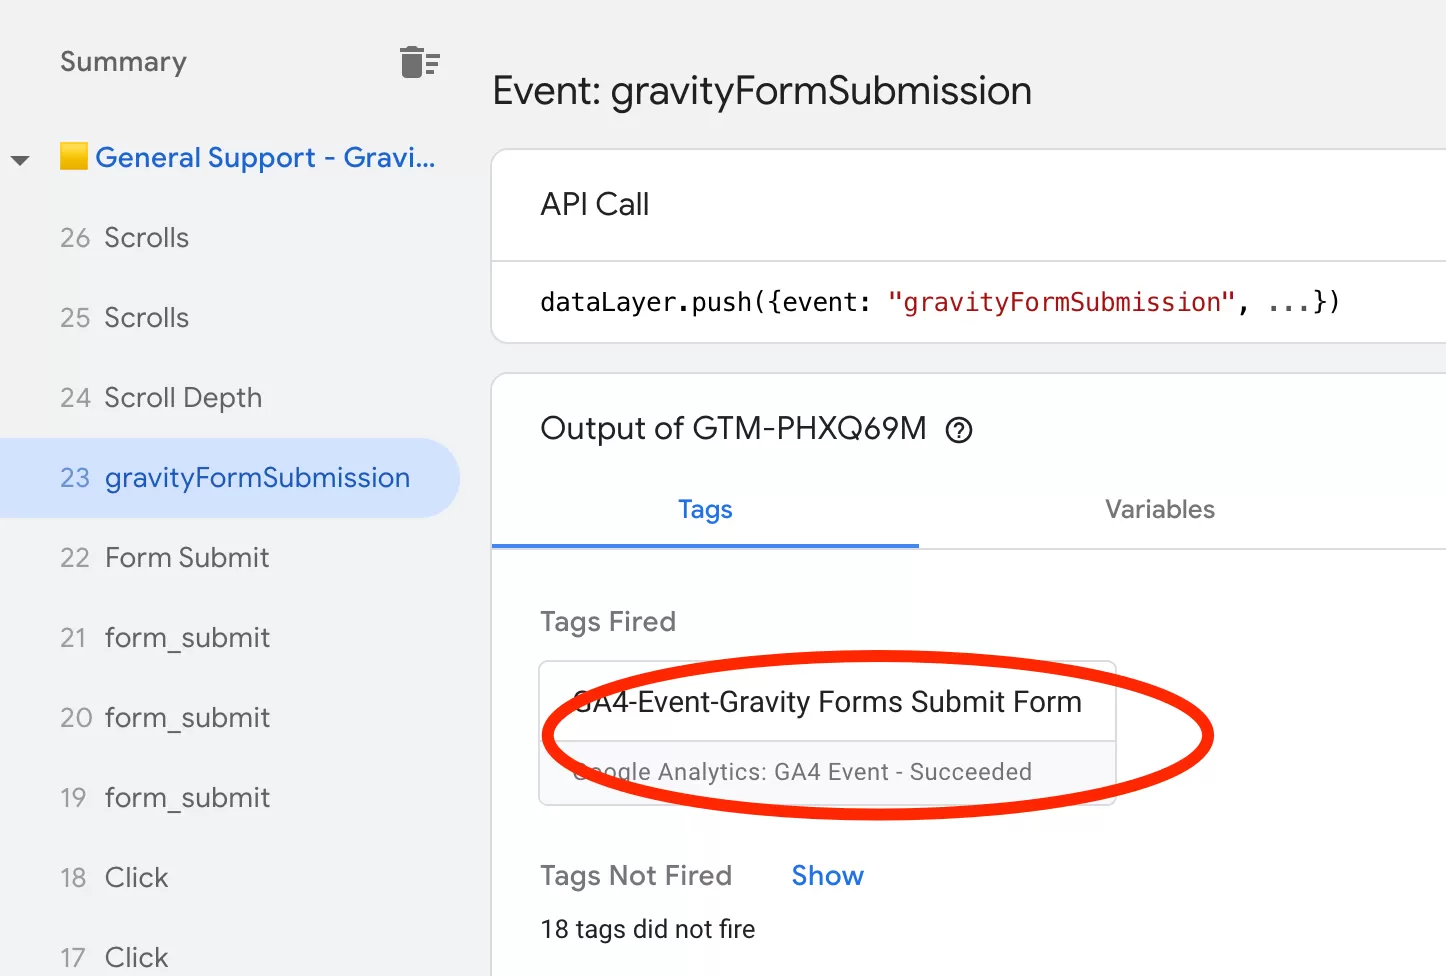
Tags is triggered and can be published.
Step 6: Register Custom Dimension in GA4
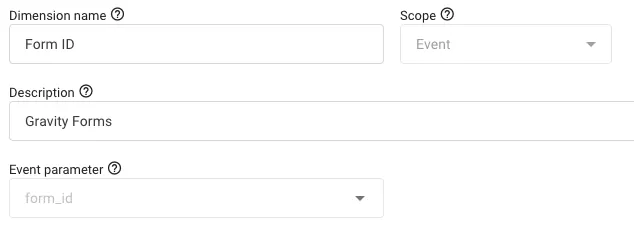
Now that the data is flowing into GA4, there’s one more step. If you want to use form_id in your GA4 reports and explorations, you need to register it as a custom dimension.
In GA4,click「Admin」——「Custom definitions」——「Create custom dimension」, then do the following configuration:
Step 7 : Verify Data in GA4 Reports
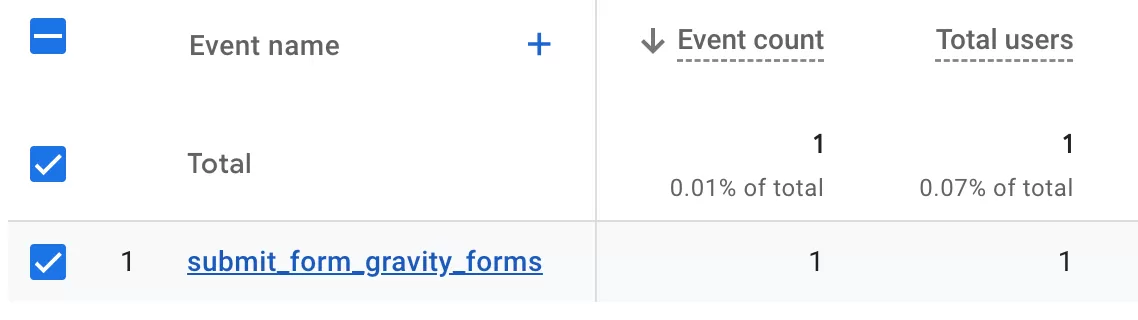
After publishing, give it about 24 hours — the typical delay before custom events appear in standard GA4 reports. Then find the submit_form_gravity_forms event in Event Reports:
Final Words
Tracking Gravity Forms submissions in GA4 is straightforward once you understand the event model. Gravity Forms fires gform_confirmation_loaded via jQuery after a successful AJAX submission. A simple listener pushes the form ID to the data layer, GTM picks it up, and GA4 records it.